You don’t have to break the bank to see some really cool things in the night sky, and many amateur astronomers will agree, the best telescope is the one that you will actually use.
You could spend a lot of money on a telescope that promises to reveal the secrets of the cosmos, but if you’re not comfortable using it, you’ll soon lose interest – not to mention the time and the money you’ve invested.
So how do you pick a telescope that you’ll want to use again and again?
You want something that’s going to:
- be easy enough to set up outside and
- provide you with a level of detail that will captivate your curiosity of the night sky.
This guide will help you figure it all out.
Different Types of Telescopes
Let’s start with a brief overview of the three different types of telescopes that are available:
- Refractor
- Reflector
- Compound (or catadioptric)
Refractor
Refactors are what most people think of when they imagine a telescope: a long narrow tube connected to a tripod. This was the first type of telescope to be invented and is also the most simple – both in terms of its construction and ease-of-use.
Refractors have a lens at the front of the tube which points up at the sky and gathers the light. This light then travels down the tube to form the awesome image in your eyepiece.
Pros:
Requires very little maintenance – there’s no need for alignment or collimation, and cleaning is also minimal.
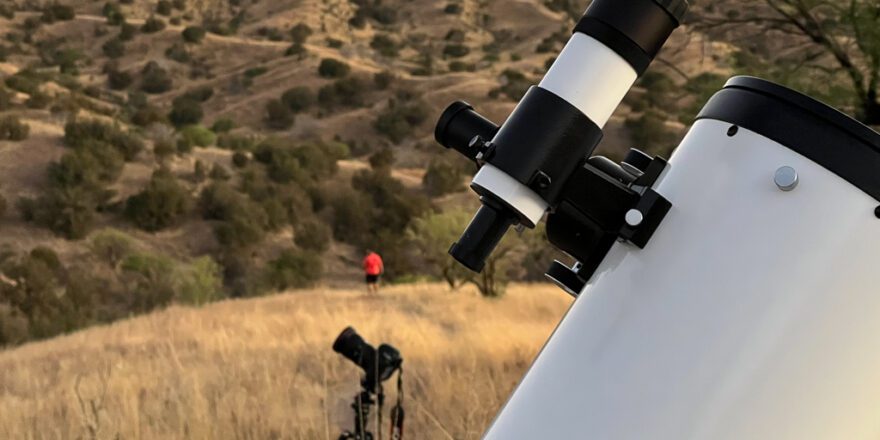
Can be very portable – refractors can be pretty light and extremely portable, making them easier to take with you on the road (or just to your patio). They can also be pretty robust. Finally, it’s a good idea to let your scope adjust to the ambient air temperature outside, especially during the winter. Refractors cool down quicker, so you won’t have to wait as long to start stargazing.
Can be used in astrophotography – if you have a serious interest in astrophotography, a refractor can set you up much better than a reflector. The catch is that a lot of research might be needed to plan your astrophotography setup, and this isn’t always easy for beginners – especially for those who don’t even own a telescope.
Cons:
Larger apertures are less practical – larger apertures capture more light and allow you to see more detail. Unfortunately, larger aperture refractors are impractical (and can be expensive); due to the nature of a refractor’s design, they tend to be large, heavy and cumbersome to use, making them impractical. It’s therefore hard to find one with an aperture larger than 150mm.
False color – the lenses can can cause image distortion, such as false color or chromatic aberration. This tends to be a problem with cheaper models, with more reputable manufacturers coating their lenses to counteract these effects.
Reflector
Reflector telescopes are open at the end of the tube that points at the sky. Light enters the tube and is then reflected off the large, primary mirror at the other end. This mirror then reflects the light to a smaller, secondary mirror, which then bounces it out of the tube via the eyepiece.
The reflecting telescope was invented in the 17th century by Sir Isaac Newton, which is why a lot of people refer to these telescopes as “Newtonians.”
In my opinion, these offer the best bang for your buck, as they’re capable of bringing out the finest details of even the faintest deep sky objects.
Pros:
Great value for money – for the amount you spend, you’ll have the opportunity to see some amazing detail compared to other telescopes.
No chromatic aberration – you don’t have to deal with the colored fringes around stars.
Fun to use – a refllector with a Dobsonian mount can be a lot of fun, as it’s so easy to use. The location of the eyepiece at the top of the scope also makes it pretty easy to observe different objects – regardless of their location in the sky.
Cons:
Not as portable – reflectors don’t have the restriction on aperture that limits refractors, and larger apertures can be pretty big and heavy. That said, you’d be surprised at how portable reflectors with 8 inches of aperture and smaller can be.
Requires some maintenance — requires occasional collimation. This means re-aligning the mirrors, which can be intimidating for newcomers. However, there are inexpensive tools available that can help you.
Inverted – the view through the eyepiece is inverted, which can be very disorienting at first, especially when you move the scope to keep an object in view. While this is confusing for beginners, with a little practice it’s easy to get used to.
Compound (AKA Catadioptric)
A compound telescope, for example a Schmidt-Cassegrain, uses a combination of mirrors and lenses to form an image. The light enters the tube through a lens, like a refractor, and is reflected off the primary mirror at the bottom, like a reflector. It then reaches the secondary mirror, which compresses the light so that it can exit the tube through a hole at the bottom of the tube. This exit point is where the focuser and eyepiece are located.
Pros:
Can be compact – the folded optical system allows these telescopes to be more compact. This can make them lighter and easier to transport.
Cons:
Maintenance – as with reflectors, you may need to occasionally collimate the mirrors.
Cost – compound scopes are typically more expensive than reflectors of a similar aperture.
Three Basic Things You Need to Know About Using a Telescope
It’s really helpful to consider the pros and cons before making your purchase, but it’s also extremely helpful to have a grasp of these three fundamentals:
- Aperture
- Focal length
- Magnification
Here are the basic things you need to know about choosing a telescope:
Aperture
The diameter of your telescope’s light-gathering lens or mirror is called its “aperture.” You can find this on your telescope and it’s usually listed in inches or millimeters (mm).
For example, on my Dobsonian reflector it says “D=200” which means it has an aperture of 200mm (about 8 inches.)
Why does aperture matter?
The more aperture you have, the more light you can capture. The more light you can capture, the fainter the object you can see and the more detail will be visible. It’s also important because larger aperture scopes are generally more expensive.
How much aperture do you need?
This really depends on what you want to observe and how much detail you want to see. What you want to observe can also depend on how much light pollution you have around you.
If you live near a town or city, you’ll need a larger aperture to see fainter deep sky objects, such as galaxies. If you live in a dark, rural area, those same objects could be seen with a lower aperture.
If you have a lot of light pollution nearby (for example, if you live in the suburbs of a city), many of those fainter objects could be lost completely, even if you have a larger aperture.
The good news is that there are some targets – such as planets and double stars – that can still be pretty spectacular, even under light pollution.
I would suggest looking at a dark sky map and getting a sense of how much light pollution you’re dealing with. If you live in an area affected by light pollution, you may want to consider a telescope that can be easily transported in your vehicle.
Focal length
Okay, so we got aperture out of the way, now let’s introduce focal length.
Focal length is important to know, as it’s relevant for both your telescope and for your eyepieces.
Put simply, it’s the distance that light must travel from where it first enters the telescope, to where it meets at the focal point. This is typically specified in millimeters (mm) and can be found on the tube, usually near where you’d insert the eyepiece.
For example, my Dobsonian shows F=1200 which means it has a focal length of 1200 mm.
Eyepieces also have a focal length, and since they’re obviously much smaller than your telescope, they have much shorter focal lengths. Like the telescope itself, the focal length of an eyepiece is measured in millimeters, and it is usually found either on the barrel or on the top.
Knowing the focal length of your telescope and eyepieces is important, as it determines the magnification (sometimes called power) of your eyepiece.
Magnification
Lots of newcomers want to know about the “zoom” capabilities of a telescope, but zoom is not really a relevant term. When it comes to telescopes, it’s more about magnification, or power. (Incidentally, no reputable manufacturer will ever advertise their telescope by boasting of its zoom capabilities.)
The same eyepiece will produce a different magnification with different telescopes, as it really depends upon the focal length of both. Fortunately, the magnification can be easily calculated using a simple formula:
telescope focal length / eyepiece focal length = magnification
That’s it!
For example, my Dobsonian has a focal length of 1200 mm, so when I use an eyepiece with 10 mm, I get a magnification of 120X.
So is there a limit to your magnification?
The short answer is yes, there will always be a cap on the magnification you can realistically use on your telescope.
As a good rule of thumb, the maximum useful magnification on a telescope is 50 times its aperture in inches or twice its aperture in mm.
My Dobsonian has 200 mm in aperture so theoretically its maximum magnification is 400X.
However, it’s very rare that you’ll be able to use your maximum magnification.
That’s because conditions have to be absolutely perfect. If the air isn’t still, it can cause a lot of distortion, making it difficult to observe fainter objects. It’s like seeing a coin at the bottom of a swimming pool; you might be able to see the coin, but if the water is moving a lot, it could distort the view so badly that you might not even recognize it for what it is!
In this scenario, using a higher magnification only magnifies the distortion, making it difficult to focus and see your target clearly.
For example, I regularly try a magnification of 360x, but I’m rarely pleased with the sharpness of the image.
Okay, so now you know aperture, focal length, and magnification. Is there anything else you should consider?
Yes – the mount.
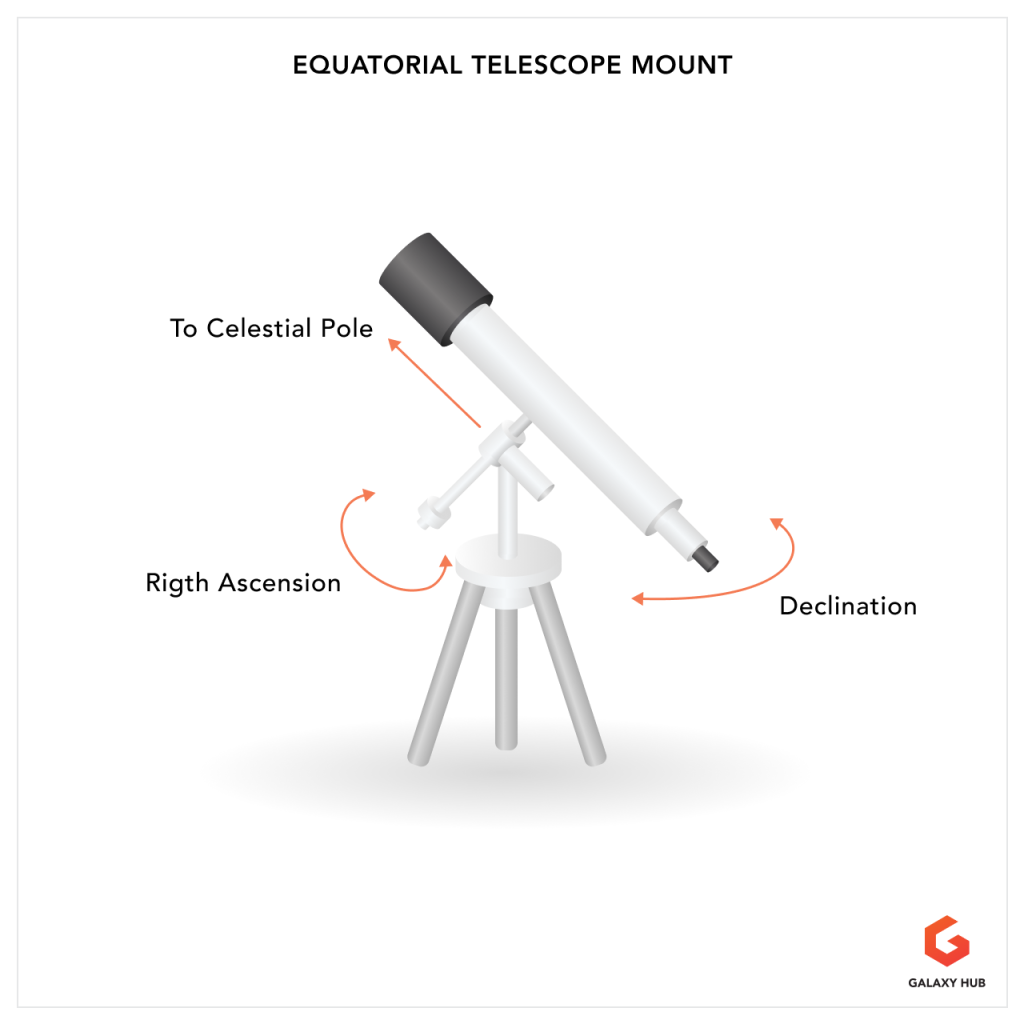
Mounts
Mounts are important because they provide the foundation for using your telescope. For example, a cheap, wobbly mount will make finding your targets and focusing much more difficult. Many scopes will come with a mount, but if the scope is aimed at experienced astronomers (who might have their own, preferred mount) then the tube might be sold alone.
As you research your scope, you’ll see two types of mount: equatorial and alt-azimuth.
You’ll probably see two types of mounts when doing research: Equatorial mount and alt-azimuth mounts.
Alt-azimuth are the easiest to use, as they have a simple left/right and up/down movement. A Dobsonian mount is an example of an alt-azimuth.
Equatorial mounts are tilted at an angle based on your latitude, and require alignment before they can be used. This allows the telescope to more easily track the Moon, planet and stars as they rise and set throughout the night.
Since alignments are needed for equatorial mounts, most beginners are probably better off with alt-azimuth mounts.
If you’re okay with something a little more technical, you can use something called a “go to” mount. This is a computerized mount with a built-in database of thousands of objects. After you select your target, the mount then moves your scope toward the target’s location in the sky. In essence, you tell the mount to “go to” the target.
It requires a little more technical knowledge, but it can be a good option for those who don’t want to spend a lot of time trying to find their target.
Personally, I think learning how to find your target (“star hopping”) is a great skill set for beginners, so I would recomend a manual alt-azimuth mount.
How to Choose Your Telescope
So how should you use this information to choose your telescope?
The first step would be to consider the pros and cons listed above. Remember, you want a scope you’ll be motivated to bring use on a regular basis.
If you can, attend local astronomy club events in your area. This can allow you to get some real world experience with different types of telescopes. This is definitely the best way to go, but it might not always be practical, as it will depend upon where you live and the local conditions.
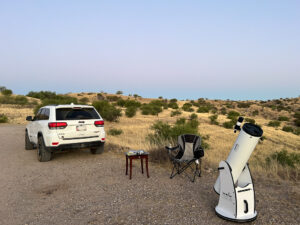
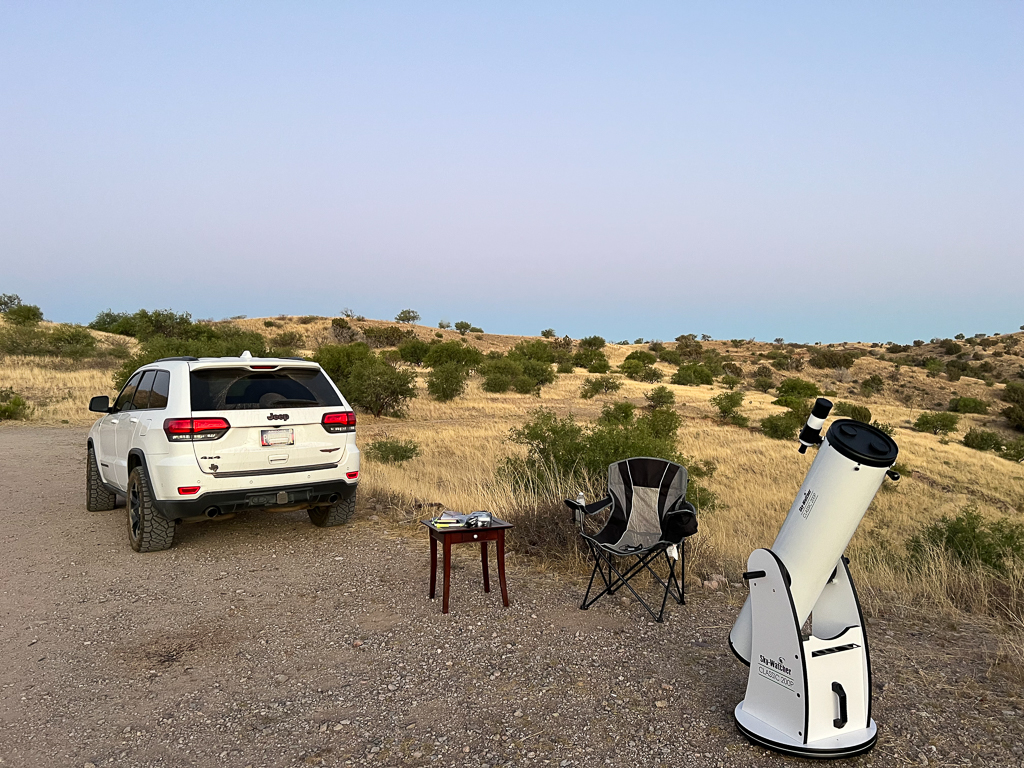
If you’re wanting my recommendation on the best beginner telescope, here is my choice: Sky-Watcher S11610 Classic 200P Dobsonian (~$650)
This to me is the ultimate amateur telescope.
Eight inches (200mm) of aperture on a reflector telescope is plenty to capture captivating detail of deep sky objects.
What’s more, it’s still portable, so you can transport it to different locations without too much hassle. If you live in an area with a lot of light pollution, this is important as it means you can drive your scope to those dark sky sites.
If portability is a must, you could also go with a six inch (150mm) aperture scope, but I personally love my eight inch. Some people even find it relatively easy to transport a ten inch.
Alternatively, if you’re new to astronomy and you’re not sure where to start, the Celestron StarSense Explorer DX 102AZ (~$400) refractor might be just the ticket. With an altazimuth mount on a tripod, this refractor is super easy to use and its 102mm aperture is capable of producing some outstanding views.
The real bonus is that you can use it with the free StarSense app, which can recommend targets and then help you to locate it in the night sky. This makes it a great tool for learning what to see and how to find it. (It’s also great for older kids!)
In the end, it may take some experimentation to find the telescope that works best for you.
Remember, you can also buy a used scope. A lot of telescopes maintain their value well, so you can always consider trading in your telescope if it doesn’t work out!