If you thought choosing your telescope is difficult, just wait until you discover all the different astronomy accessories!
Unfortunately, the thing about accessories is that you won’t always find universal agreement on what is the best route to take, as people have their own preferences and no set of eyes are the same.
That being the case, it’s going to take a little bit of experimentation to get the right mix of accessories for yourself, but my list should be a good starting point.
The (Mostly) Essential Beginner Accessories
In my opinion, the most important accessories are:
- Multiple eyepieces
- Barlow (for some)
- Filters (for some)
- T-ring mount/adapter (for some)
- Dew cap (for some)
- Table
- Red light
- Star chart
- Star hop guide
- Astronomy chair
- Green laser
Eyepieces
A lot of telescopes come with multiple eyepieces, so you may not even need to purchase any additional eyepieces for a while.
My preference is to have one high-power eyepiece and one low power eyepiece. A high-power eyepiece will result in magnification somewhere around 120X+ while a low power eyepiece will be closer to 40X.
(Remember that magnification = telescope focal length / eyepiece focal length.)
A high power eyepiece is physically shorter and therefore has a shorter focal length, whereas a low power eyepiece is longer, and can show you larger objects and a wider field of view.
A common beginner misconception is that you need as much magnification as possible, but as you start to find deep sky objects, you’ll soon realize that getting too close can sometimes make it difficult to fully appreciate what you’re looking at.
There are other aspects of eyepieces to consider too, such as apparent field of view, true field of view, eye relief, and exit pupil, but most beginners don’t need to delve too deep into these.
One last tip: always make sure that your eyepiece is the same size as the focuser on your telescope. More specifically, focusers will either accept a 1.25″ or 2″ eyepiece, and while you can buy adapters, you don’t want that additional expense.
Good brands for eye pieces include: Baader, Celestron, Explore Scientfic and TeleVue.
Barlow lens
Barlow lenses can help magnify what you see through the eyepiece, and will multiply the magnification of any eyepiece you use with it.
For example, a 2X Barlow will double the magnification of the eyepiece, so if you have an eyepiece that produces a magnification of 30X, using a 2X Barlow with it will double the power to 60X.
Barlows typically come as 2X, 2.5X, 3X or 5X.
These are fantastic to have when viewing the planets and double stars, but they can also be useful for deep sky objects.
One big advantage is that you can double the magnification of your eyepiece without restricting your field of view.
A high magnification eyepiece will have a smaller field of view than a low magnification, but if you use a Barlow with the lower powered eyepiece, you get the higher magnification without any loss in the field of view.
However, you’ll need to remember that a higher magnification doesn’t always look as good as you think it will.
Not every deep sky object is suited to high magnification and your telescope may not be able to handle a magnification that’s too high. (It’s also harder to focus at higher magnification.) For example, using my 3X Barlow has been a real challenge in my experience.
For beginners, I would recommend a 2X or 2.5X Barlow.
Good brands for barlow lenses include: Tele Vue, Powermate, and Baader.
Filters
Filters can be attached to your eyepiece and allow you to see an enhanced image. This often involves increasing the contrast, which makes it easier to see texture and details.
They are interesting because opinions are very much divided on the need for filters.
That’s largely because people have different preferences for how they like to view planets and deep sky objects.
Once again, no pair of eyes are exactly the same, so you might view an object differently than someone else, even though you’re using the same telescope, eyepiece, and filter.
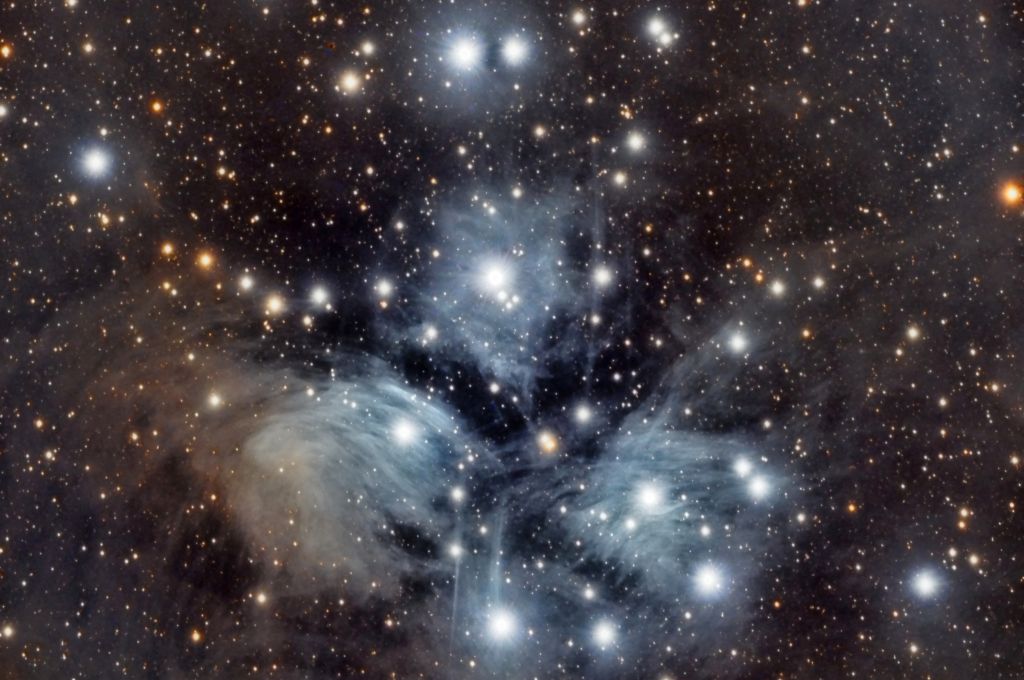
Personally, I’m not the biggest fan of filters, although I do use them quite often for nebulae. Most beginners probably don’t need more than one or two, and many could go without any filters at all. (Although a lunar filter is essential if you want to observe the moon.)
But if you do want to experiment with filters, here are some different types of filters you might think about getting:
- Nebula filters
- Light pollution filters
- Planetary filters
- Lunar filters
A quick word about lunar filters; the moon can be very bright, and if you try to observe it through a telescope without a filter, you’ll be dazzled.
At the very least, your night vision will be utterly ruined.
A lunar filter can block out the vast majority of the light, making it easy to observe the moon without any discomfort. Be sure to get a neutral density filter, as this will block light without discoloring the moon. (Cheaper filters can give the moon a funky green color.)
If you don’t have a filter, you can also try wearing sunglasses or utilize the hole in your dust cap to bring down the aperture.
The most common filter I use is a Lumicon Gen 3 O-III.
I really love the contrast it puts on planetary nebulae, and even some emission nebulae, such as the Swan Nebula. Other people like to use something like a Lumicon UHC to increase the contrast on nebulae.
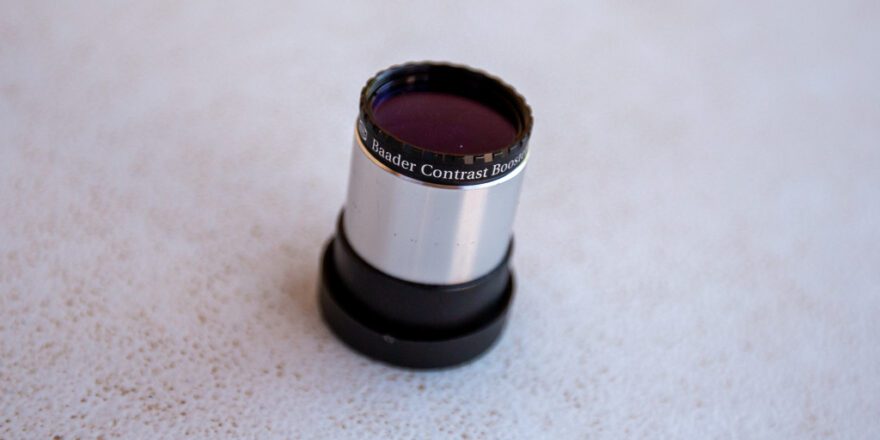
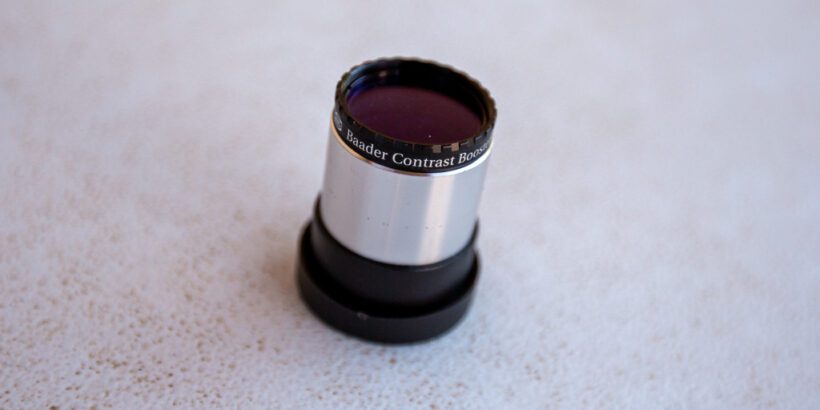
I’ve also used a Baader Planetarium Contrast Booster Filter for planets such as Jupiter and Mars, but I find the value of these type of filters to be more subjective. That’s because they alter the color in ways that some people may not appreciate.
For those who live in or near heavy light pollution, a sky glow filter can help block the most common wavelengths of light pollution, although it can also depend on the type of lights used.
Good brands for filters include: Astonomics, Thousand Oak, and Lumicon.

T-ring and T Mount Adapter
If you’re seriously interested in astrophotography, you’ll be embarking on a completely different journey that involves a lot more complexity (and expense!) than anything covered in this guide.
But if you just want to play around with getting some shots of the planets, the moon, and the occasional bright deep sky object, you can get an adapter that allows you to take photos with your DSLR, or even a smart phone.
Personally, I use a cheap SVBONY T2 T Ring Adapter to take images of Saturn, Jupiter, Mars, and sometimes things like M57, the Ring Nebula, with my Canon 6D.
The photos don’t come close to professional images, but sometimes they’re good enough to share with others and to capture the experience.
What’s nice about these adapters is that they can be very cheap!
Dew Cap
If you live in a humid environment, you could also invest in a dew cap. This can help keep your lens warm, so that it’s not impacted by the moisture that forms from the humidity.
Small Table
Having a small table gives you somewhere to put your books, charts, eyepieces, filters, drinks, snacks, etc.
Some astronomers even like to use a music stand to prop up a star atlas.
Red Light
A handy red light will allow you to illuminate charts and books, and help you see where you’re walking without affecting your night vision, as blue or white light does.
Some people prefer a headlamp while others prefer a traditional flashlight (or both).
Be aware that some red lights can still be pretty bright, so try to find one that can be dimmed for the appropriate level.
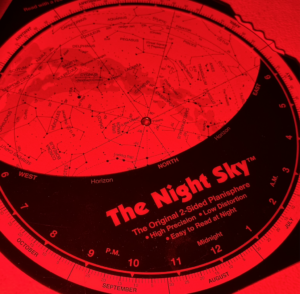
Star Finder (Planisphere)
A star finder or planisphere is great because it’s a quick way to see what constellations you can expect to see in the sky.
I sometimes refer to this planisphere during my observing sessions, but it’s best to find one that’s designed to work at your latitude.
Star finders and planisphere have been around for many years and are very easy to use. You simply line up the date and time, and then you can see what to expect based on the direction in which you’re looking (ie, north, east, south, west).
These can be really helpful if you have not been out in a little while and are struggling to recognize the constellations.
Apps can also do the trick, but you might sometimes need connectivity, and the brightness from your phone or tablet will likely affect your eyes.

Star Hopping Book or Star Atlas
Having a comprehensive book containing lots of the notable objects is an invaluable resource when you’re researching potential targets or out in the field.
You’ll be able to discover objects to view and, more importantly, find steps for “star hopping” to locate them.
Simply glancing at a star chart and then pointing your telescope in that direction isn’t enough.
However, if you have a book like Turn Left at Orion to guide you, you can strategically star hop (by moving from one star to another) until you eventually find exactly what you’re looking for.
Astronomy Chair
You definitely want a comfortable chair when spending a lot of time with your telescope. One option is a specialized astronomy observing chair that can be easily adjusted to make observing more comfortable.
Other people get by with just normal lawn chairs, or even office chairs, so it really just depends on what works with your budget and individual preferences.
But I will say that my stargazing got much more comfortable after I purchased a proper astronomy chair!

Green Laser
Having a green laser pointer is a great way to involve other people in your astronomy sessions.
You can use these to point to objects of interest, and guide others to find objects on their own.
Of course, you have to be careful not to point them toward anyone’s face, and also be mindful of aircraft that could be flying above. Always check your local laws to make sure these are permitted.
These laser pointers can be purchased for under $20 so they can be very affordable.
Thermos
You might find yourself freezing some nights (even the summer can be chilly!) so having a thermos with a hot beverage is a great way to help you stay warm when you’re outdoors.
Final Word
While this may seem like a lot of accessories, this does not even cover all of the potential accessories you might end up using as an amateur astronomer.
In the end, a lot of times it comes down to trial and error and figuring out what works for you!