To put it simply, an eyepiece has two functions: to magnify the view through your telescope and, indirectly, to bring that view into sharp focus. For example, if you’re looking at the Moon, without an eyepiece you’ll see nothing but a bright, blurry mess, but with an eyepiece you’ll see craters, mountain ranges and a whole host of other amazing features that would otherwise remain unseen.
So how does this happen? And how can you choose the best eyepieces for your scope?
How Does an Eyepiece Work?
As you can imagine, both your telescope and your eyepieces are intricate pieces of equipment. (Incidentally, you should never dissassemble either one – leave that to the professionals!)
To start with, let’s take a look at how a refractor telescope works. Light enters through the large objective lens at the end of the optical tube. This lens is convex, and as such, it bulges slightly and bends the rays of light inward.
These rays of light then converge into a single point, close to the eyepiece at the other end of the optical tube. This point is known as the focal point, which lies on the focal plane. Assuming your objective lens is perfectly concave, the focal point would be at the precise center of the plane.
However, imperfections in your lens could cause the focal point to be slightly off-center, resulting in poor image quality (for example, chromatic aberration, which produces a rainbow effect around high-contrast objects like the Moon.)
Of course, the rays of light don’t simply stop there.
They continue moving along the tube toward the eyepiece, but because they crossed at the focal point, the image is now reversed. The light then exits the optical tube through the eyepiece.
The eyepiece acts a little like the objective lens, but in a slightly more complex fashion. For starters, eyepieces are typically made up of more than one lens. These lenses work together to refract the light so that it both magnifies and reforms the image.
This is a two-step process.
The first lens in the eyepiece is concave. It takes the light and refracts it outward (as opposed to the convex objective lens that refracts light inward) , thereby enlarging the image.
However, now the image is larger than the second eyepiece lens, which can therefore only refract the light it receives from the central portion of the image. As a result, when you look through the eyepiece, you’ll see the magnified central portion of the image.
(It’s worth remembering that the image will be inverted at this point – sometimes both vertically and horizontally.)
Focal Length – The Key to Understanding Magnification
When you use a telescope, you’ll naturally want to use different magnifications. For example, a low magnification of 30x might be great for observing large objects, such as the Moon, but won’t be much help if you’re interested in tracking features in Jupiter’s atmosphere.
The magnification you’ll get from an eyepiece will depend on both the eyepiece and the telescope itself. You can use the same eyepiece in two different telescopes and get a different magnification each time. How is this possible?
It all comes down to the focal length of the telescope and the focal length of the eyepiece you’re using. Focal length is the distance, in millimeters, between a telescope’s primary mirror or lens and the focal point.
Your telescope’s focal length will most likely be somewhere between 300mm and 1300mm, and you can find it specified on a label on the side of the optical tube.
It’s a similar story when it comes to the eyepiece – but in reverse.
The focal length of an eyepiece is the distance from the focal point to the first lens of the eyepiece. As this is a much shorter distance, you’ll find that eyepieces have a focal length that typically range from around 6mm to 30mm.
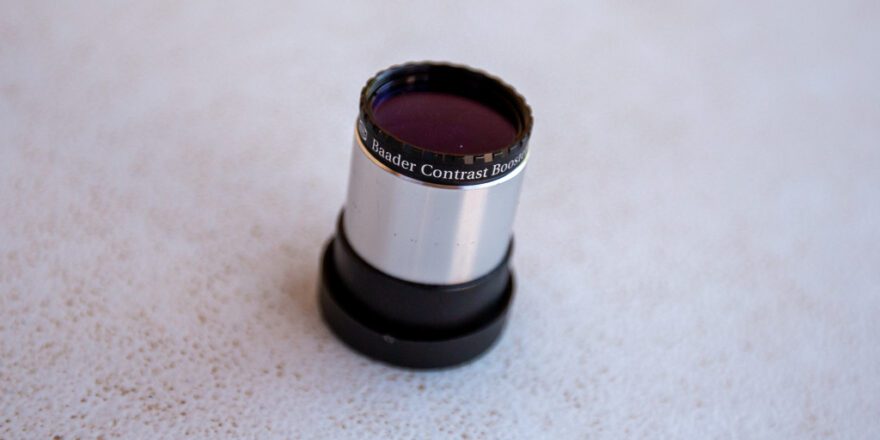
Again, as with a telescope, you’ll find the focal length of the eyepiece on the side of the eyepiece itself, usually at or near the top.
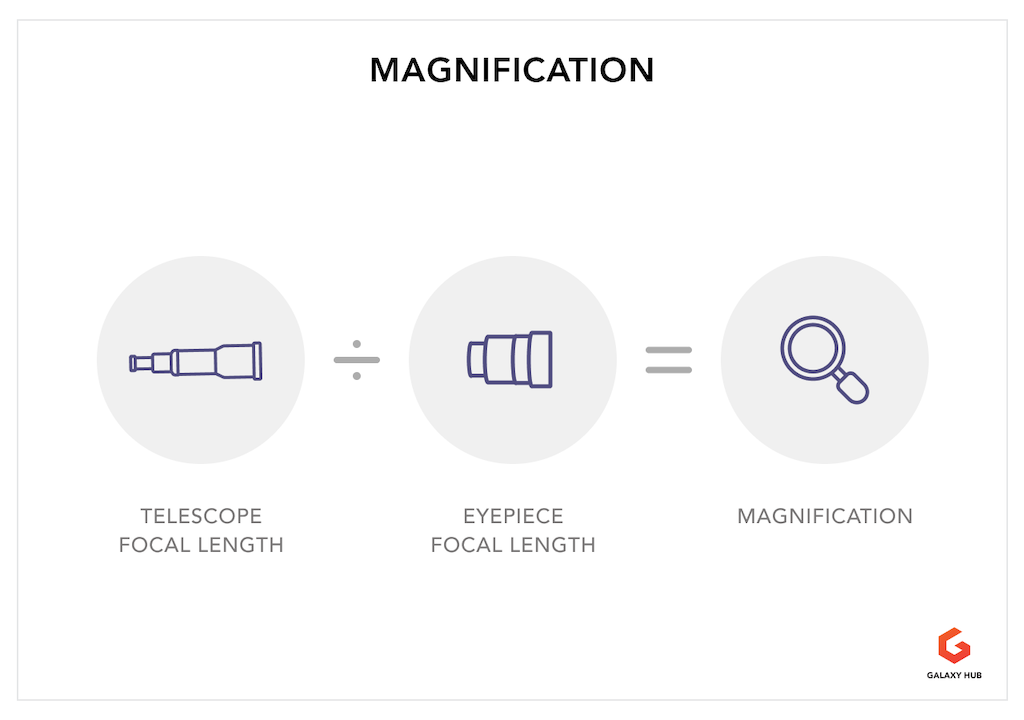
To calculate the magnification, you only need to divide the focal length of the telescope by the focal length of the eyepiece. For example, a telescope with a focal length of 1000mm and a 10mm eyepiece will provide a magnification of 100x.
However, use that same eyepiece in a telescope with a focal length of 750mm, and you’ll get a lower magnification of 75x (750 / 10 = 75).
Knowing how magnification is calculated, it soon becomes apparent that telescopes with longer focal lengths are capable of producing higher magnifications. Conversely, eyepieces with longer focal lengths produce lower magnifications.
As discussed, a telescope with a focal length of 1000mm and a 10mm eyepiece produces a magnification of 100x. However, a 20mm eyepiece (ie, double the focal length of the 10mm) will produce half the magnification – 50x. (1000 / 20 = 50).
Other Eyepiece Considerations
Although the focal length (and therefore the magnification) is probaby the most important aspect of an eyepiece, it isn’t the only specification you should consider. Others include:
- Exit pupil and eye relief
- Apparent and true field of view
- 1.25″ vs 2″ eyepieces
The Exit Pupil and Eye Relief
Once you understand the concept behind focal length, the exit pupil and eye relief of an eyepiece are easier concepts to grasp. To start with, the exit pupil is the point where all the light exiting the eyepiece converges, effectively forming a disc.
The exit pupil of the eyepiece is also measured in millimeters and describes the width of this disc. It can be calculated by dividing the aperture (in millimeters) of the telescope by the magnification produced by the eyepiece.
If, for example, you had a 250mm aperture telescope and were using an eyepiece producing a magnification of 50x, the exit pupil would be 5mm. (250 / 50 = 5).
Another formula to arrive at the exit pupil is to divide the focal length of an eyepiece by the focal ratio.
But what does this really mean?
Essentially, if the exit pupil of your eyepiece is too large, then your eye won’t receive all the available light and the view will suffer as a result.
As you may know, the pupil of your eye dilates in the dark to allow more light in, and it’s been said that your eye will dilate to a maximum of 7mm. Therefore you don’t want an eyepiece that will create an exit pupil larger than 7mm.
However, as you might expect, it’s not quite that simple.
For starters, your eyesight changes as you get older. Generally speaking, the older you are, the less your eye can dilate. In other words, 7mm might be fine for someone in their twenties, but not so good for someone in their seventies.
To complicate matters further, regardless of age, everyone’s eyes are different. Just because two people are the same age, it doesn’t mean their eyes will dilate to the same diameter. Similarly, it’s entirely possible that an older person’s eyes may be able to dilate more than a person half their age.
All that being said, if you don’t know the exit pupil for your own eyes, 7mm serves as a good guide for most people.
Eye relief is a little simpler; this is the distance from the eyepiece that the exit pupil is formed. As such, it’s the maximum distance you can look through the eyepiece and still see the entire image.
Any further away and you won’t see everything. This is important to know if you wear glasses, as it will give you a rough idea of how far away you can comfortably look through the eyepiece without removing your eyewear.
Generally speaking, if you wear glasses, it’s a good idea to have an eyepiece with an eye relief of 15mm or more. Even if you don’t wear glasses, a longer eye relief will give you a little more comfort. It will also help to avoid situations where your eyelashes brush the eyepiece because you need to position your eyes too close to see everything.
If you don’t know the eye relief of your eyepiece, hold it up to the light and move it closer until you can see the entire field of view.
Knowing both the exit pupil and eye relief of your equipment can help make your observing sessions more comfortable and allow you to spend more time outside.
What is the Apparent and True Field of View?
When it comes to eyepieces, you shoudl also be aware of both the apparent and true field of view. They have similar, but different meanings, and it’s easy to get the two confused.
Apparent Field of View (AFoV)
Apparent field of view is the width of the view you see when you hold up an eyepiece to the sky and look through it. AFoV is measured in degrees.
The wider the apparent field of view of your eyepiece, the more the image will fill your eye’s field of view.
While this is great on a practical level, there’s also a huge aesthetic benefit to this wider view. Quite simply, a wide AFoV gives you an amazingly immersive feeling of being there.
When you can see nothing else except the hundreds or thousands of stars in a star cluster, or a striking double star, it’s easy to convince yourself you’re truly exploring the cosmos.
Most eyepieces will have an AFoV between 30 and 110 degrees, with many of the affordable wide-angle eyepieces falling within the 50 to 70 degree range. Anything more than that is considered ultra-wide angle and is likely to be quite expensive!
Something else to remember: the larger the AFoV, the larger (and heavier) the eyepiece, so you’ll want to make sure your telescope is capable of supporting its weight.
For example, if you insert a 70 degree wide-angle eyepiece into a small, 60mm aperture telescope, the chances are its weight will cause the eyepiece end of the telescope to sag down toward the ground (even if you fully tighten the altazimuth screws to lessen the movement.)
Wide-angle eyepieces can be expensive to produce, so generally speaking, the eyepieces that come with your telescope will have a narrow AFoV, and some of the eyepieces can be quite uncomfortable and diffcult to use as a result.
However, a reputable manufacturer (eg, TeleVue, Celestron, Orion etc) will always specify the AFoV of any additional eyepieces you buy, so you’ll know what to expect beforehand.
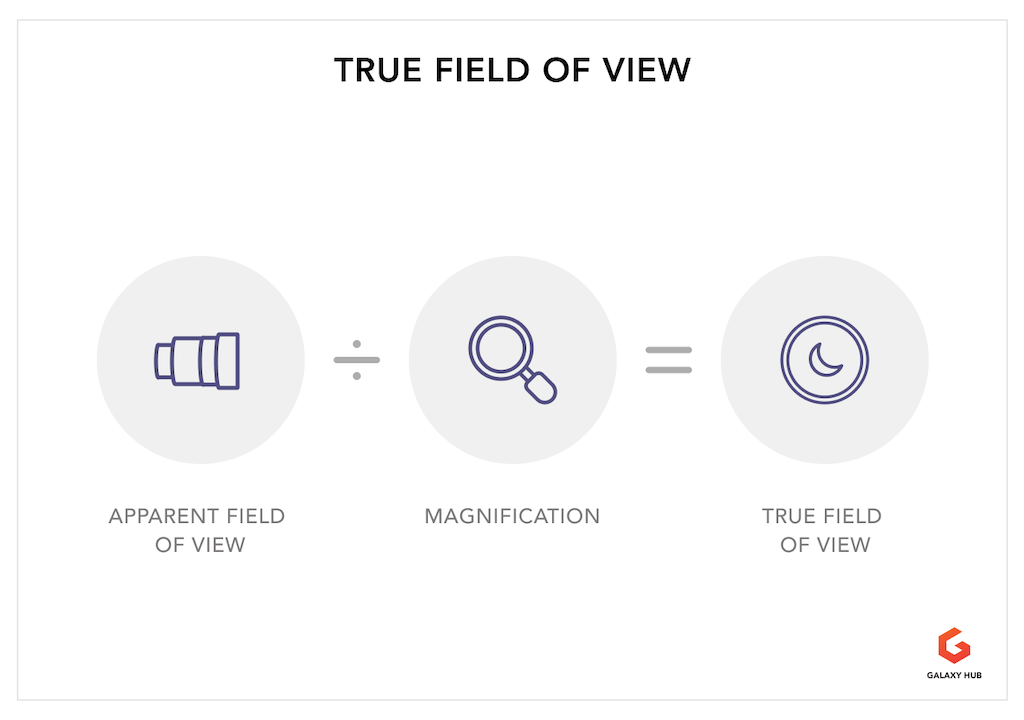
True Field of View (TFoV)
This is how much sky you’ll see through the eyepiece when your eyepiece is inserted into your telescope, as measured in degrees.
For example, the full Moon (on average) appears half a degree in size in the sky, so any eyepiece that produces a true field of view (TFoV) of more than half a degree will show you the entire Moon.
The TFoV of an eyepiece will therefore depend on its magnification – which, in turn, depends on its focal length and the focal length of the telescope you’re using it with.
To calculate this, you only need to divide the AFoV by the magnification.
For example; let’s say you have a wide-angle eyepiece with an apparent field of view of 70 degrees and a focal length of 20mm. If your telescope has a focal length of 1000mm, then your magnification will be 50x. (Telescope focal length / eyepiece focal length = magnification.)
We then need to divide the AFoV by the magnification (70 / 50) which gives us a true field of view of 1.4 degrees of sky, or nearly three times the size of the full Moon.
It’s important to remember that a larger apparent field of view won’t make objects bigger, but it will allow you to see more of the surrounding sky. A different eyepiece, producing the same magnification, will show the Moon as the same size, but you’ll see much less of its surroundings.
Again, as with the apparent field of view, the larger the true field of view, the more immersive the experience. It can also make locating objects easier. If, for example, you know a faint galaxy lies a degree away from a magnitude 5 star, a larger true field of view can allow you to keep the star in view while you search for the galaxy.
The Difference Between 1.25″ and 2″ Eyepieces
When folks talk about 1.25″ or 2″ eyepieces, they’re essentially referring to the width of the eyepiece barrel.
Telescope focusers are built to primarily accept one size or the other (usually 1.25″) and you’ll need to know which size is compatible with your scope.
However, you can buy adapters that will allow you to use both – but why bother?
Well, there’s one fundamental difference between the two sizes; since a 2″ eyepiece has a wider barrel, so you’ll get a wider field of view as a result.
Generally speaking, 1.25″ eyepieces can have shorter focal lengths and can produce higher magnifications.
However, their physical size means the potential field of view is smaller. This makes them better suited to planetary work, or observing smaller deep sky objects, such as galaxies and planetary nebulae.
Conversely, 2″ eyepieces have longer focal lengths and can produce a lower magnification and a wider field of view. This makes them a great choice for the Moon and larger deep sky objects, such as open clusters. Regardless of what you’re observing, a wider true field of view will always give you a more immersive view.
The table below shows the range of focal length and field of view you can typically expect from 1.25″ and 2″ eyepieces. (This information is based upon eyepieces that are currently available and there are always exceptions to the rule.)
| 1.25″ Eyepieces | 2″ Eyepieces | |
| Focal Length | 2mm – 40mm | 5mm – 56mm |
| Apparent Field of View | Up to 82 degrees | Up to 120 degrees |
On the face of it, it might seem as though 2″ eyepieces are generally a better choice – however, they’re more expensive and since many amateur telescopes are built for 1.25″ eyepieces, you’ll find your options are also more limited.
Wrapping Up
Understanding these key numbers can not only give you a better idea of which eyepieces you need, but can also give you a much more enjoyable experience at the eyepiece. The right combination of focal length, eye relief and field of view can provide you with a comfortable, immersive experience that’s also breathtaking and inspiring.