If you’re getting ready for your first astronomy session, you’ll want to do a little planning to get the most out of your night under the stars.
You really don’t have to do that much work, but there are some essential things that I think everyone should at least consider doing.
In this article, I’ll walk you through a few questions that will help you plan out your first astronomy session.
What Type of Skies Will You be Under?
Arguably the most important thing you need to think about when planning a stargazing session is this: what type of skies will I be under?
This will help set your expectations in terms of what you can realistically see with your telescope, and hopefully prevent you from wasting time.
A huge part of this is figuring out how dark your skies are, and an easy way to do that is to check where your location/zone falls under the Bortle scale.
The Bortle scale is a scale from one to nine that measures the light pollution of a given area. The lower the score, the darker the sky.
You can use a map like this to locate your Bortle zone, and that will give you an indication of how dark your sky will be.
One last thing about dark sky areas….
Some of these areas can be located in very remote regions that may not always be the safest place, especially if you’re observing alone.
It’s really hard to enjoy a night of stargazing when you feel like you’re constantly watching your back — whether that be for wildlife or sketchy characters.
Connecting with an astronomy club can allow you to join group outings, so you won’t be observing alone. It’s also a great way to learn more about the night sky.
The other sky conditions you should consider are:
- Astronomical twilight
- Cloud cover
- Moon phase
- Conditions in the atmosphere
Astronomical twilight
There are actually three different phases of twilight:
- Civil twilight
- Nautical twilight
- Astronomical twilight
Astronomical twilight is defined as being when the geometric center of the sun is 18 degrees below the horizon.
At the end of astronomical twilight the sky becomes truly dark and this is about the time that I start looking for deep sky objects. (As an aside, you can start looking for bright objects like planets around sunset.)
You can use this tool to find astronomical twilight times at your location. Just search for your city and then scroll down and you’ll see the times you need.
I recommend planning to be at your observing location at around sunset, so you have some light to set up. If you’re planning on doing a morning session, you’ll probably want to start a few hours before sunrise.
Cloud cover
If the weather forecast calls for cloudy skies, you might as well sit it out and wait for another night.
However, sometimes the clouds will break and you’ll have pockets of visibility, but consider this: it can be hard for beginners to locate constellations and stars when the skies – not to mention the constellations and stars themselves – are partially obscured.
One interesting thing is that sometimes planets like Jupiter can pop a bit more under thin clouds, so clouds are not always bad!
Moon phase
The phase of the moon is important because even under dark skies, a full moon is going to reduce the detail you’ll see in deep sky objects — and sometimes drown them out altogether.
However, more important than the moon phase is probably the moonrise and moonset time.
Sometimes the moon will be very bright, but if it doesn’t rise until later in the night, you could still get away with a couple of hours of pretty dark skies.
If you want to observe the moon itself, the most interesting time is not at full moon (when the moon is dazzlingly bright) but whenever you can view the terminator (the shadow running across the surface of the moon).
Those deep shadows allow you to see a lot of detail in the craters and hills on the moon, which can be some of the most exciting things to explore.
Atmospheric conditions
Finally, it could be helpful to check the atmospheric conditions in your area.
You can use a map like this to find a nearby location that should give you an approximate idea of what to expect.
You’ll see several different metrics on there, including smoke, wind, humidity and temperature.
You don’t need to stress over all these things, but it will help to become familiar with them and understand how they affect your ability to stargaze.
For example, you may notice that if you live in a hot urban environment, the heat leaving the ground affects your ability to see clearly on summer evenings.
One metric I would recommend paying attention to is called the seeing, which dictates how clearly objects will appear in your telescope.
On a day when the seeing is bad, a planet like Jupiter could look like it is boiling in water.
The seeing can fluctuate throughout a night so I don’t always base my decisions on that alone, but it’s something to consider.
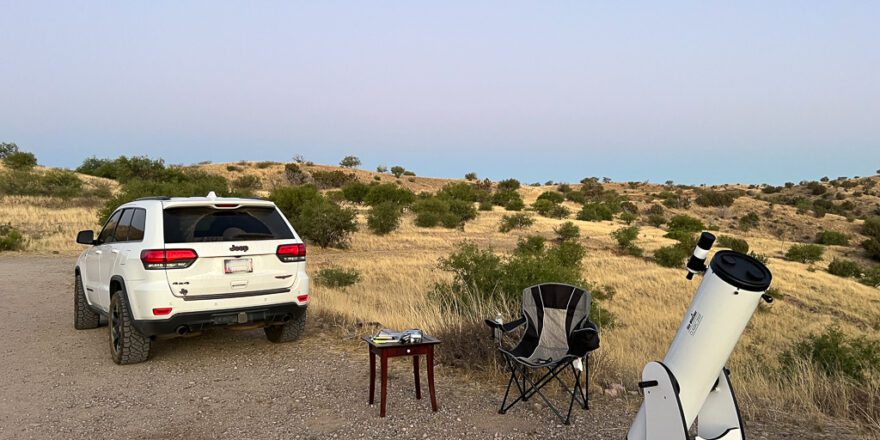
What Equipment Will You Need to Bring?
If you’re just heading out to your back patio, then you should have easy access to all your equipment, but if you’re driving out to a dark sky site, then you’ll need to choose your equipment wisely.
My essentials for every stargazing session include:
- Telescope (of course!)
- Multiple eyepieces
- Appropriate filters, as needed
- Chair
- Small table
- Star chart and star hopping book
- Red flashlight
- Appropriate clothing for weather
- Snacks/drinks

What Will You be Looking At?
Sometimes it’s fun to just point your telescope and start finding random objects in the sky, or to try to find a deep sky object on your own.
But if you’re like me, you’ll get a lot more enjoyment by planning out the objects you want to observe for a given night.
I start by checking a book like Turn Left At Orion to see what objects will be visible during that particular time of the year. Star charts can also help you with this.
If you want to see exactly what the sky will look like based on your location and time, use an app like Stellarium, as this is a great way to preview the night ahead.
After I see what the possibilities are, I make a list, which looks something like this:
- M101 – Pinwheel Galaxy – p.100
- M51 – Whirlpool galaxy – p.108
- M13 – Globular Cluster – p.199
- M66 – Lio Trio Galaxies – p. 283
The “M” designation stands for Messier and comes from the French astronomer Charles Messier. Messier was an 18th century comet hunter who identified 110 non-cometary objects in the sky as a means to avoid confusing them with potential discoveries.
Learning designations like these can help you remember deep sky objects (and it makes it easier to sound like a real astronomer when you talk about them!)
I also include the name or nickname in my list, such as the Whirlpool Galaxy, for better recall.
Sometimes you’ll notice that something might have multiple names like the Omega Nebula aka Swan Nebula aka Checkmark Nebula. In those cases, just go with whichever is easiest for you to remember.
It’s also worth researching tips on how to observe your targets. For example, you could Google something like “best filters for the swan nebula”.
This will give you an idea of which filters you should try for the best results.
Putting a corresponding page number for each object will make it very easy for you to locate them in your reference books when you’re out in the field and need to do some star hopping.
It can also be helpful to make notes as you find these objects.
For example, I’ll notate which objects are difficult to find because those are the ones I like to go back and try to relocate. I do this repeatedly so they become easier to find. Some people also like to take notes of what the object looks like or even sketch them out.
Of course, if that’s a little too much work for you, then just enjoy the view. You can always jot down some notes if you feel motivated. (Tip: make your notes at the eyepiece. It’s easy to forget details or second-guess what you saw later!)
Once you know your skies and conditions, rounded up your equipment, and have determined which objects you want to see, you’re ready to get out in the field and enjoy your stargazing!